Environment Art
Unreal Engine 5 + Blender + Substance Painter


Progress Video - Blockout to Finish
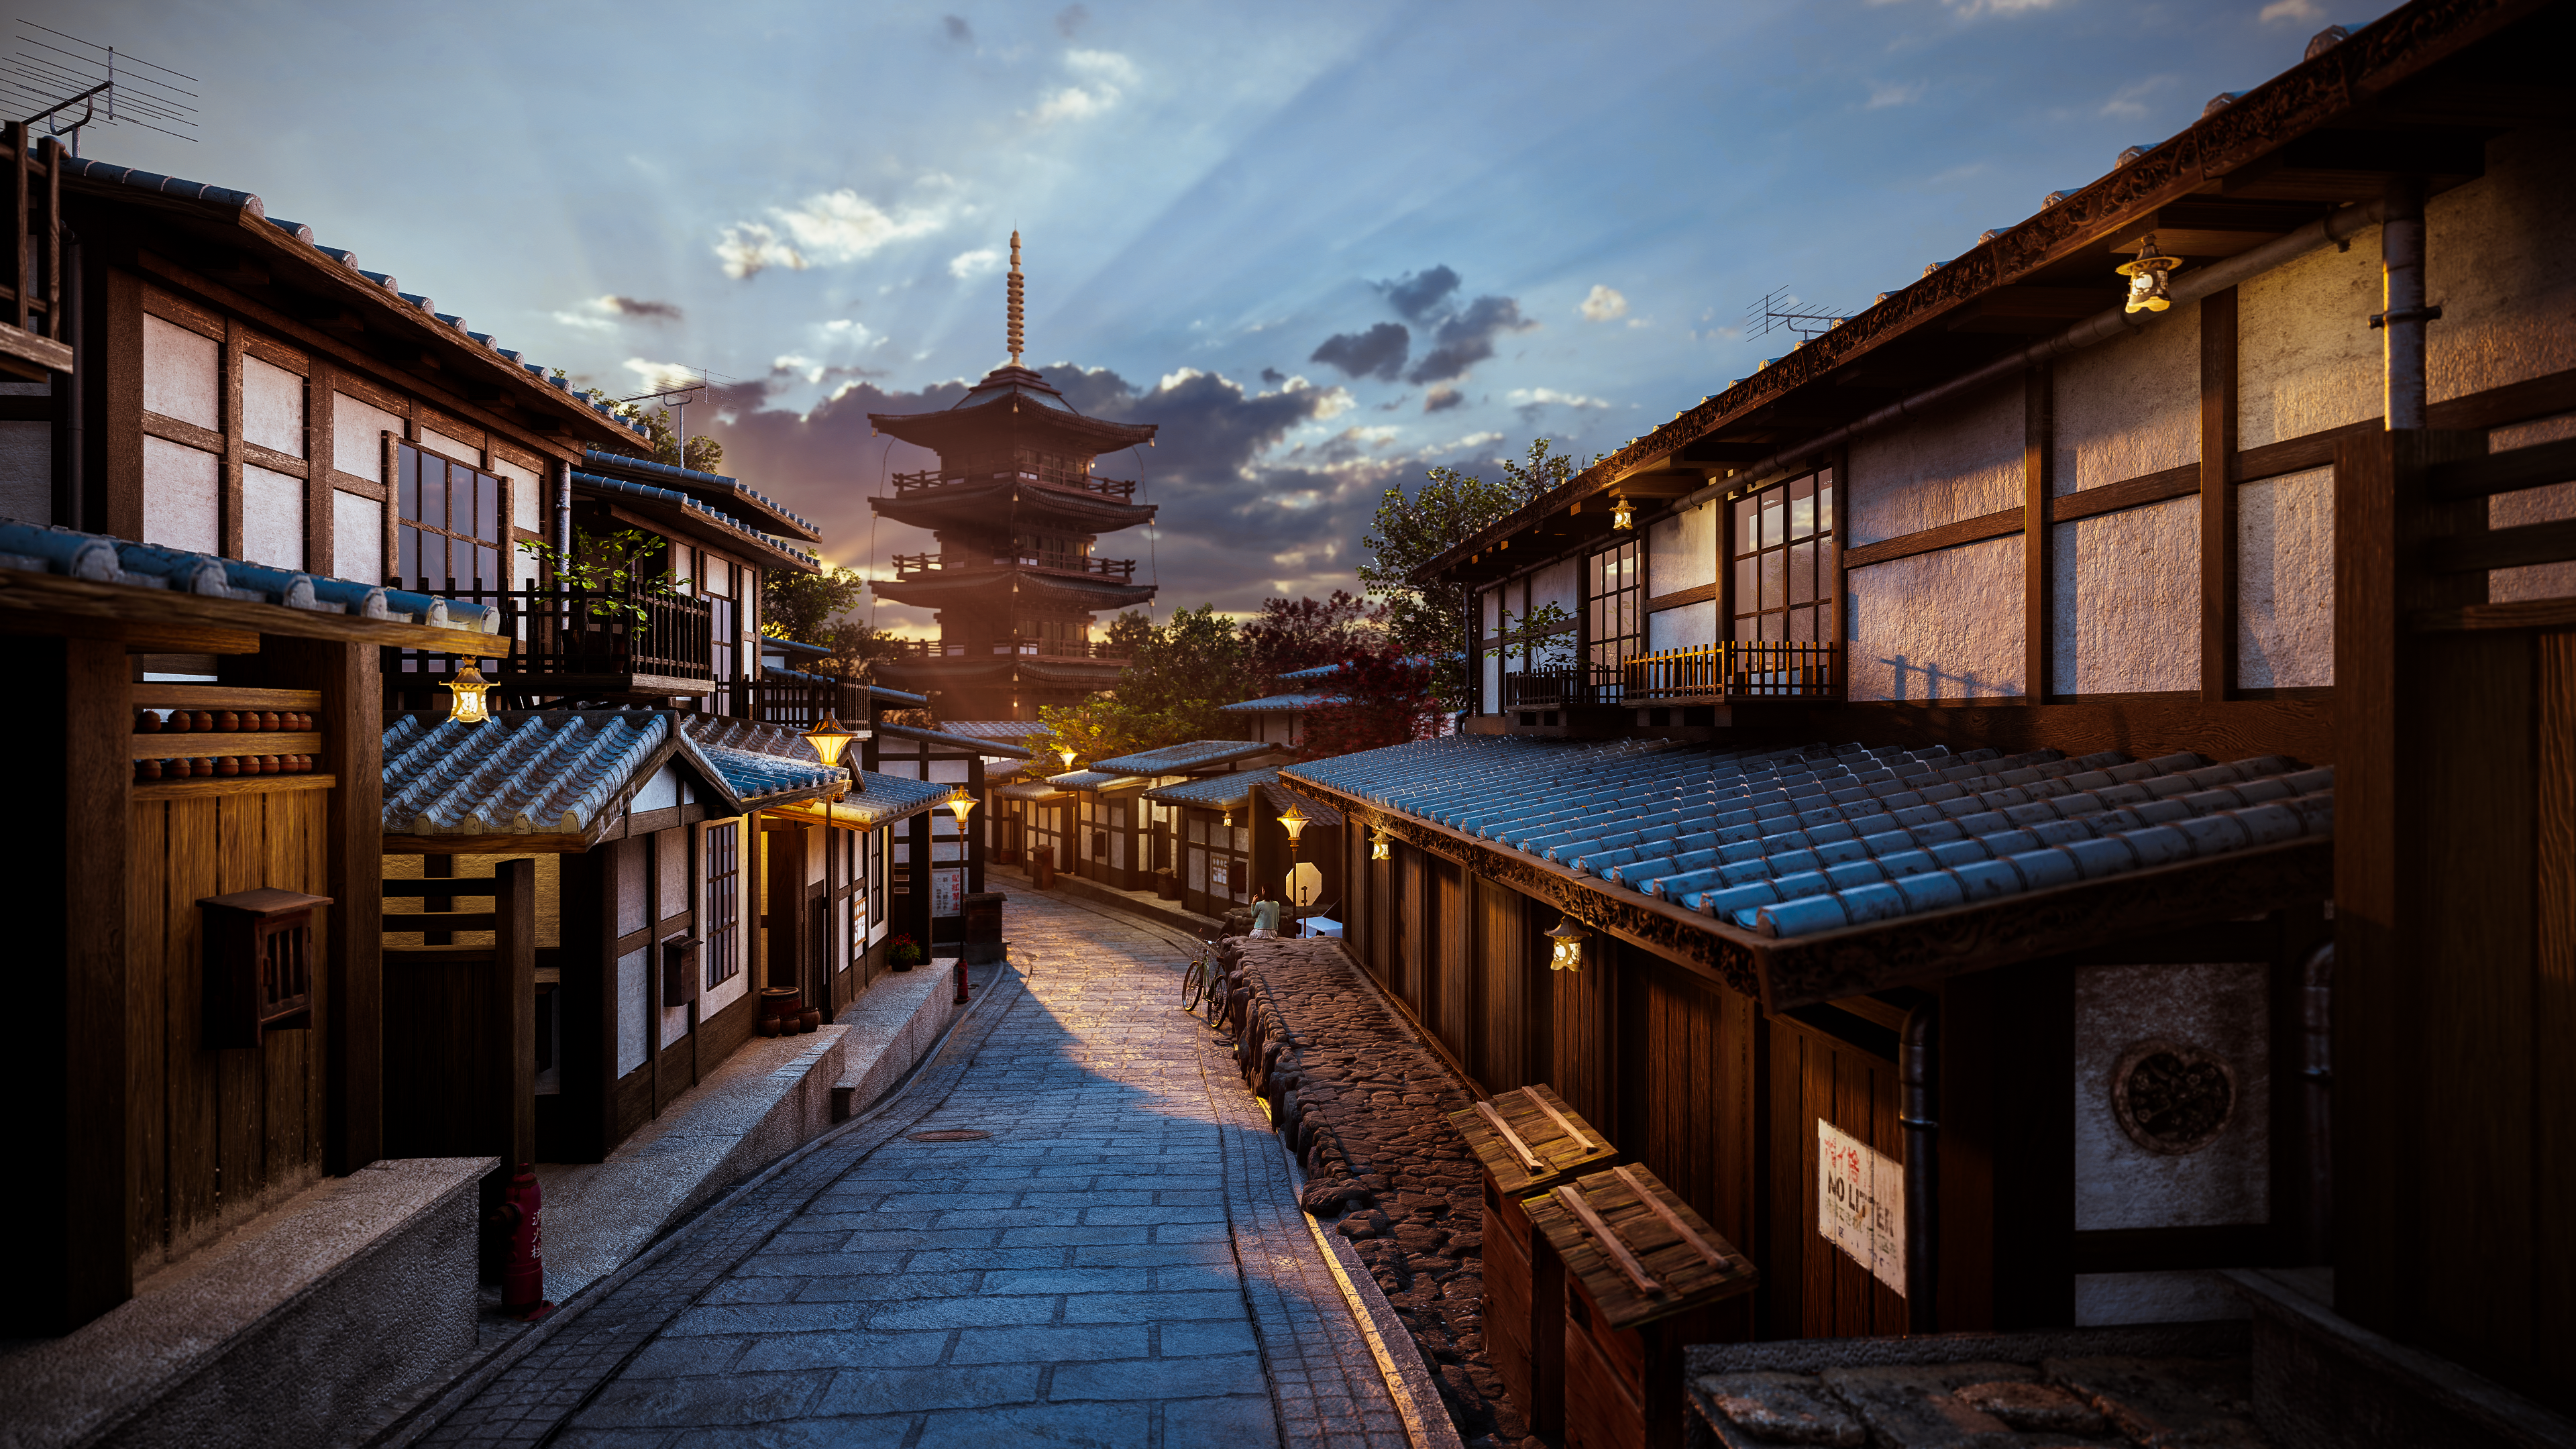
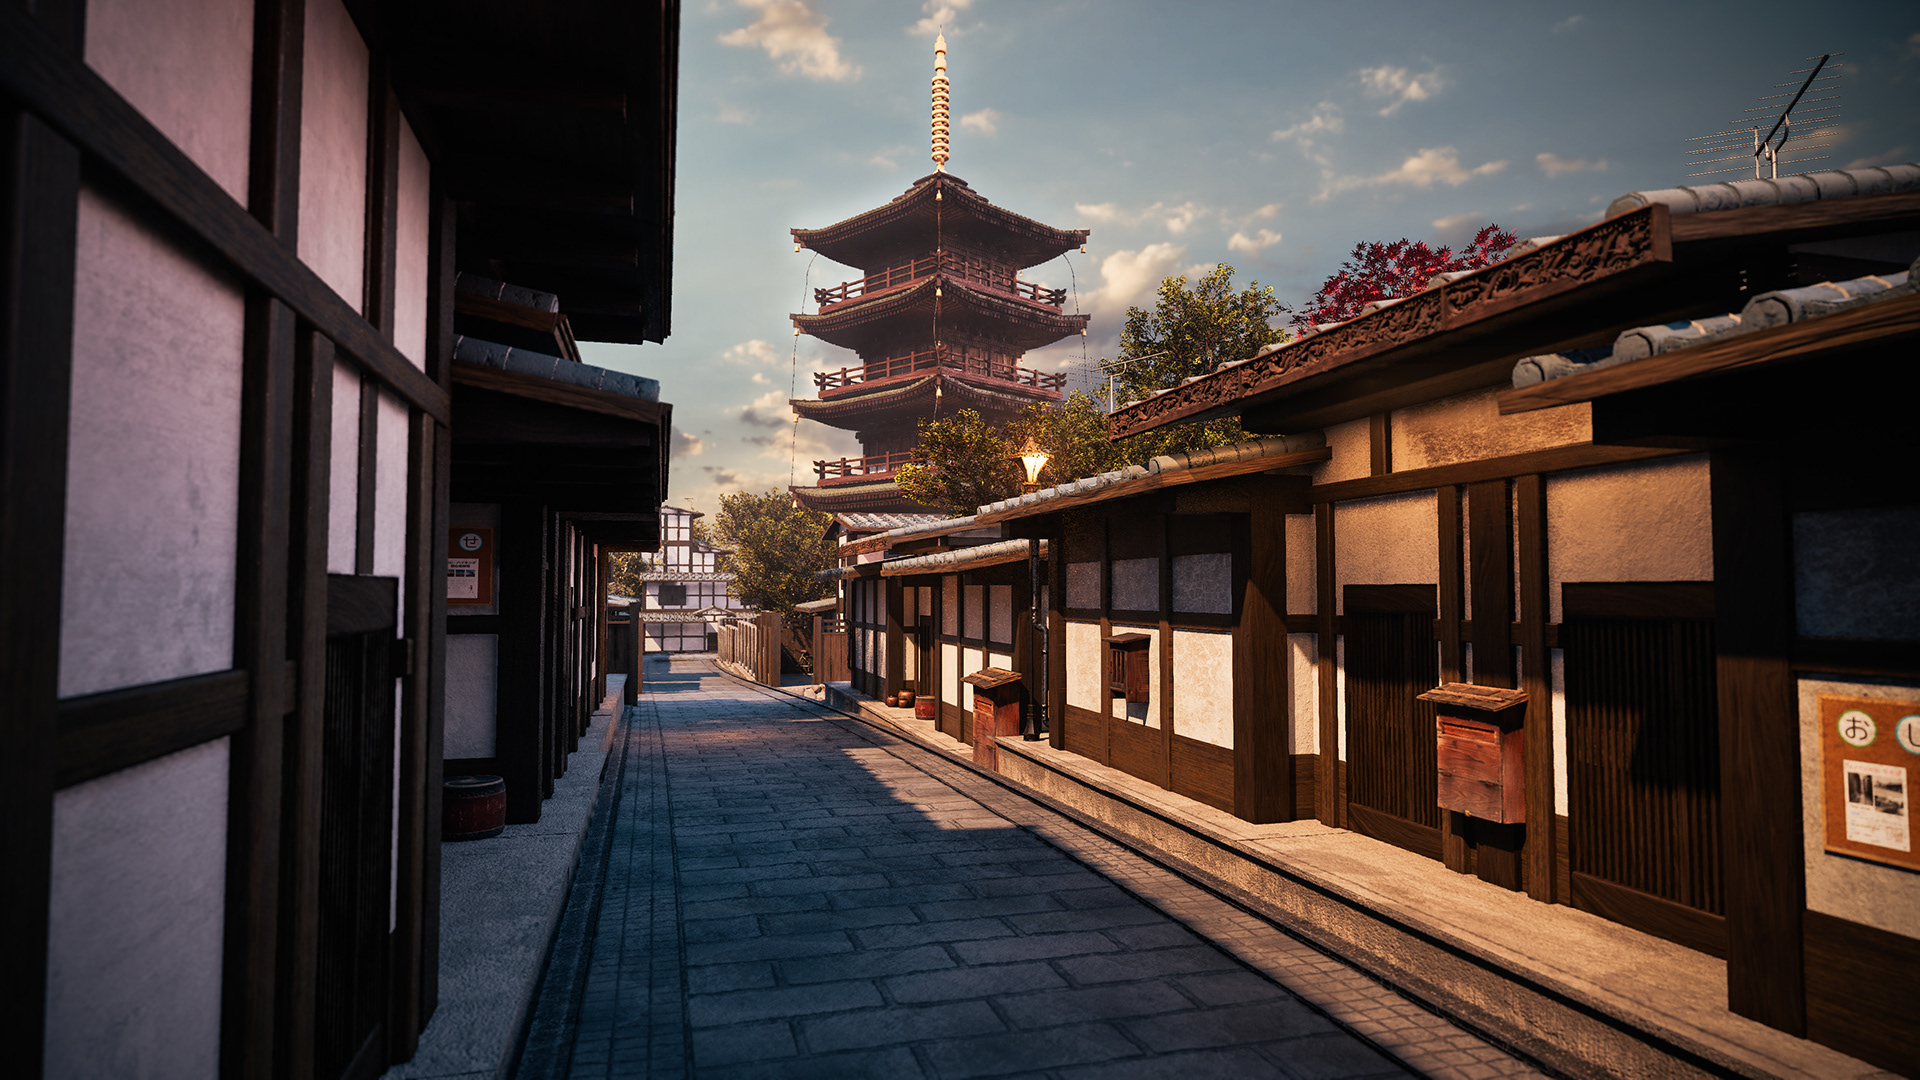
Kyoto is a beautiful city with many different kinds of places. However I wanted to capture the essence of the traditional buildings present in Kyoto. As always, my first step was to gather as many references as I could get as I wanted this to be a big environment that looks good and makes you feel immersed in Kyoto no matter where you are in the scene.

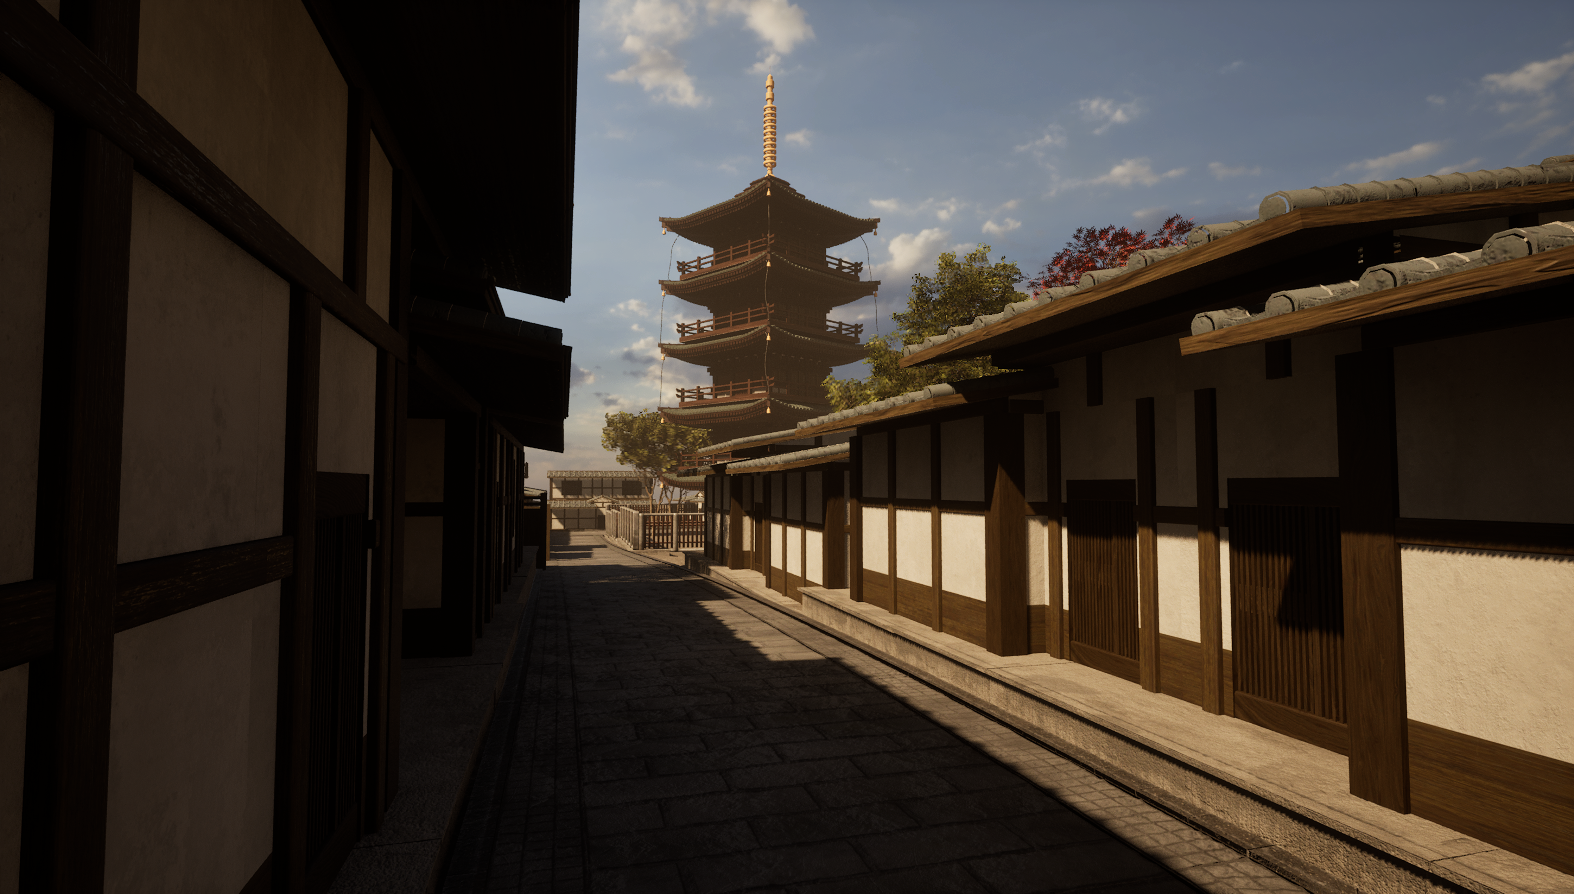
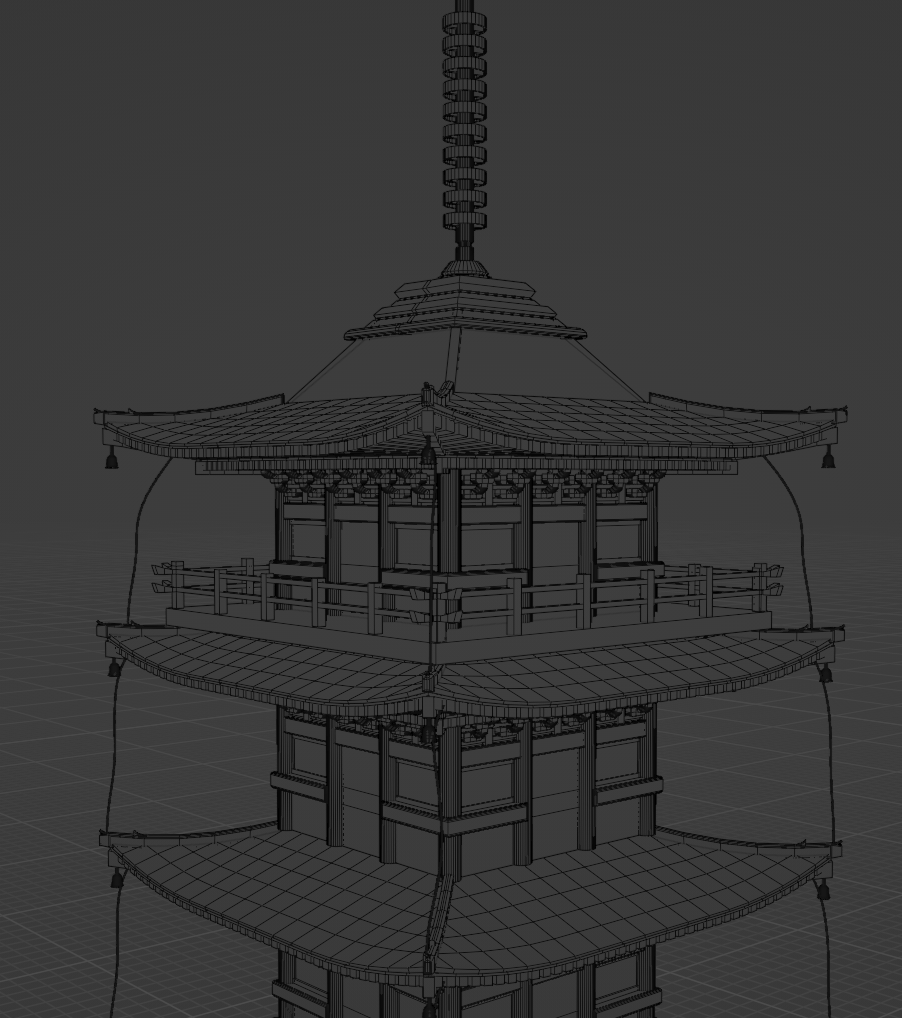
My main inspiration was the Yasaka Pagoda aka Hōkan-ji Temple. I dove into Google Earth pro walking down the streets of Ninenzaka, Kyoto exploring the surroundings of this temple and taking in the main elements of this area. This involved accounting for the sloped roads, the wooden walls and plaster walls as well as the famous stone paths and roads. After absorbing all this, i created a basic sketch in Procreate to mark the layout to help me with the blockout process.
I then started my Blockout - Phase 1 by placing primitive shapes like rectangles to get a general scale of the area. I used the landscape spline system to mark out the roads.
Once i established a good placement for all the buildings, I created a simple modular kit in Blender to help me with my Blockout - Phase 2. This comprised of untextured objects with more details to match the actual shape of the buildings present. I constantly repositioned the default UE Mannequin to help me get the scale right. In Kyoto, the height of storeys and doors are smaller than what we are normally used to which made it hard to get the scale correct.


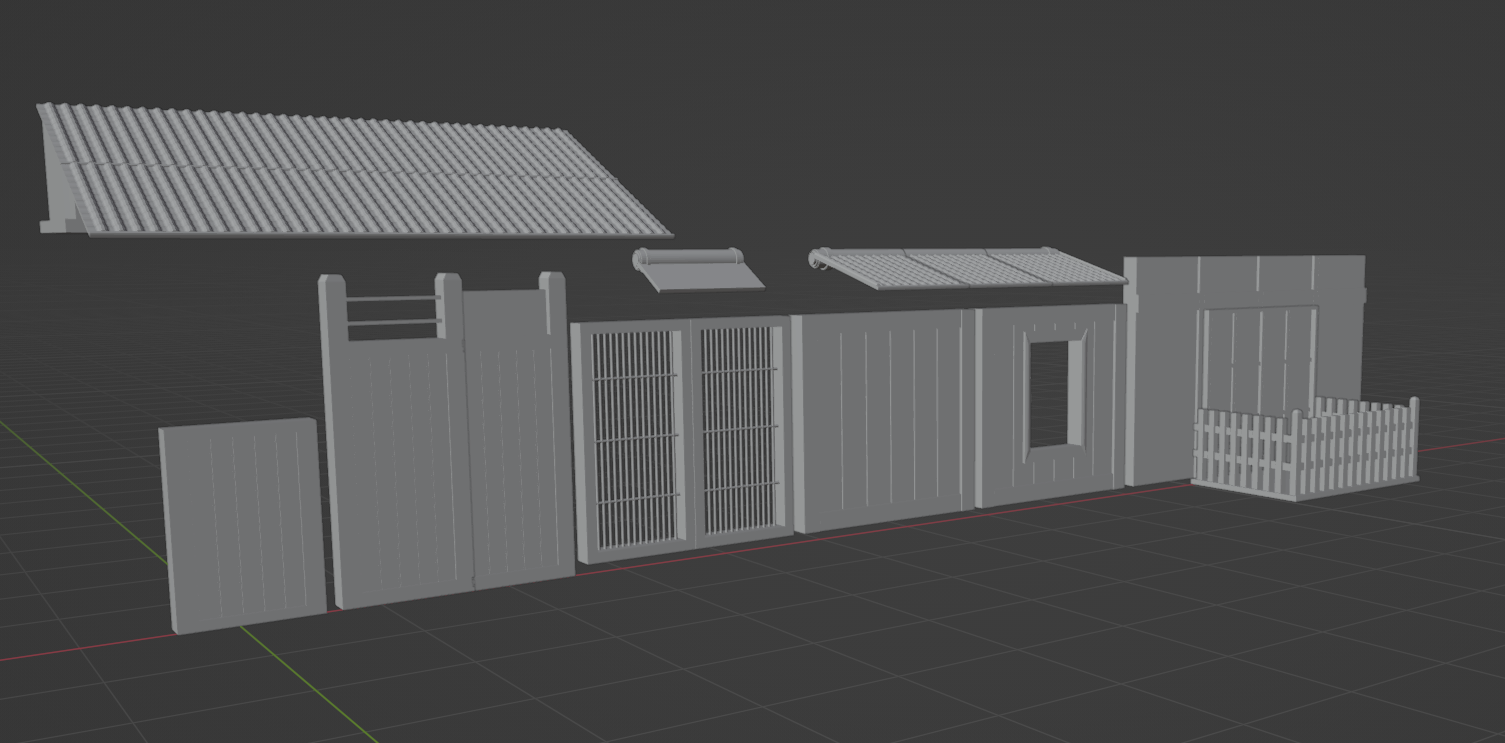
Once the blockout was done, the next step was the most time consuming process. I wanted to create a modular building kit that snaps to the UE grid to many different variations of buildings using the same couple of meshes.
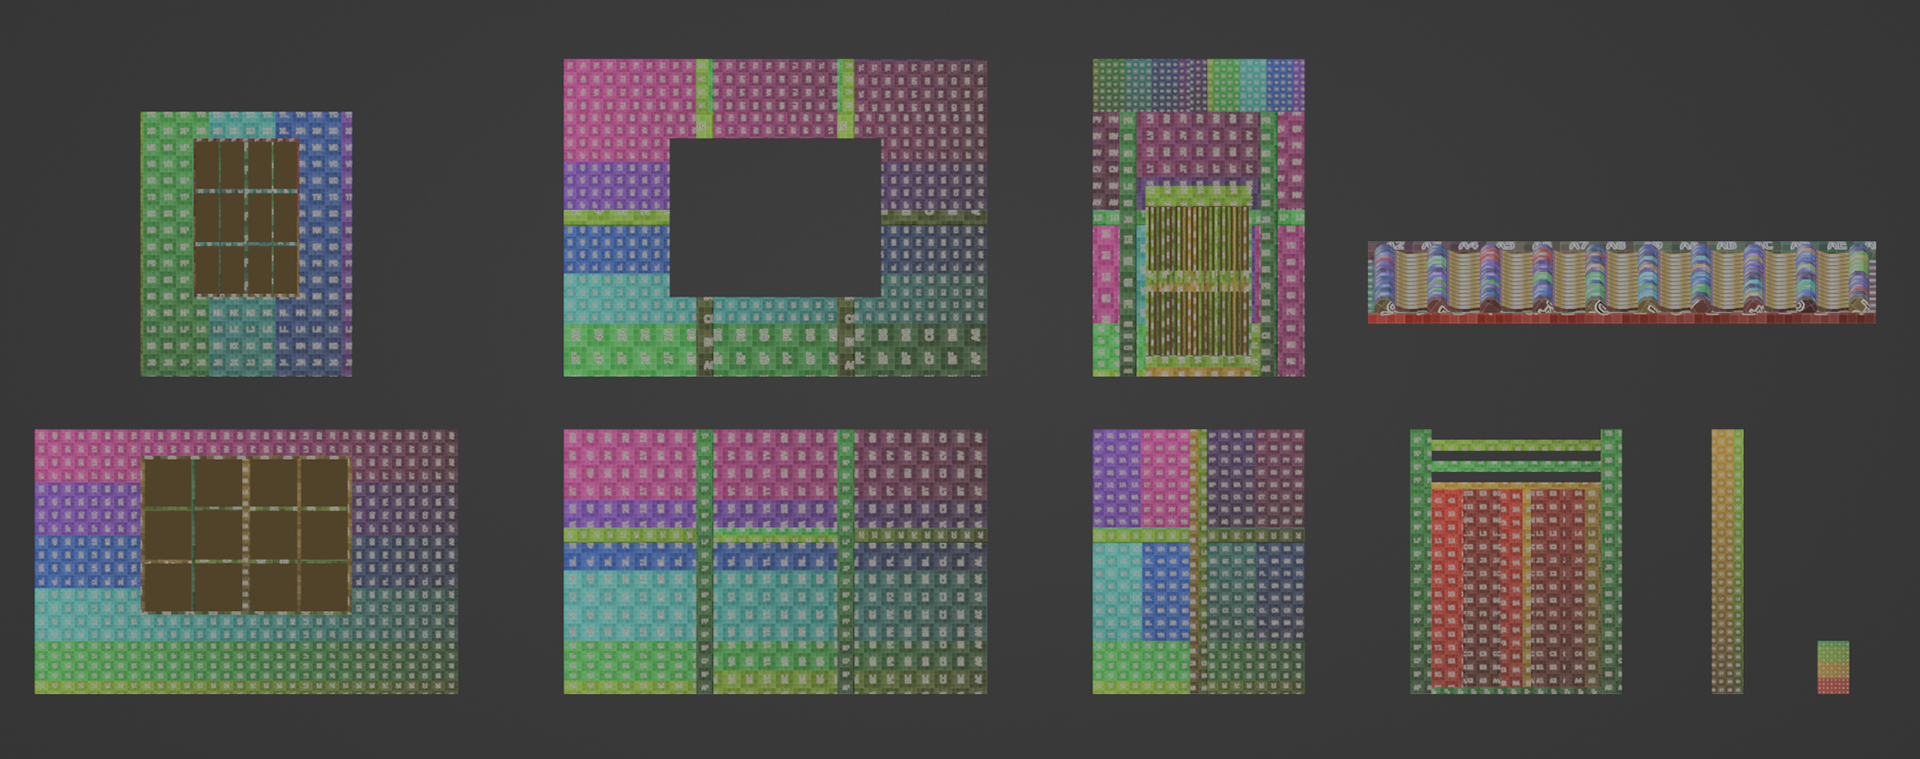
Adding onto this, due to the scale of the environment, I wanted to utilize Trim Sheets to reduce the number of draw calls and textures in the scene to improve performance.
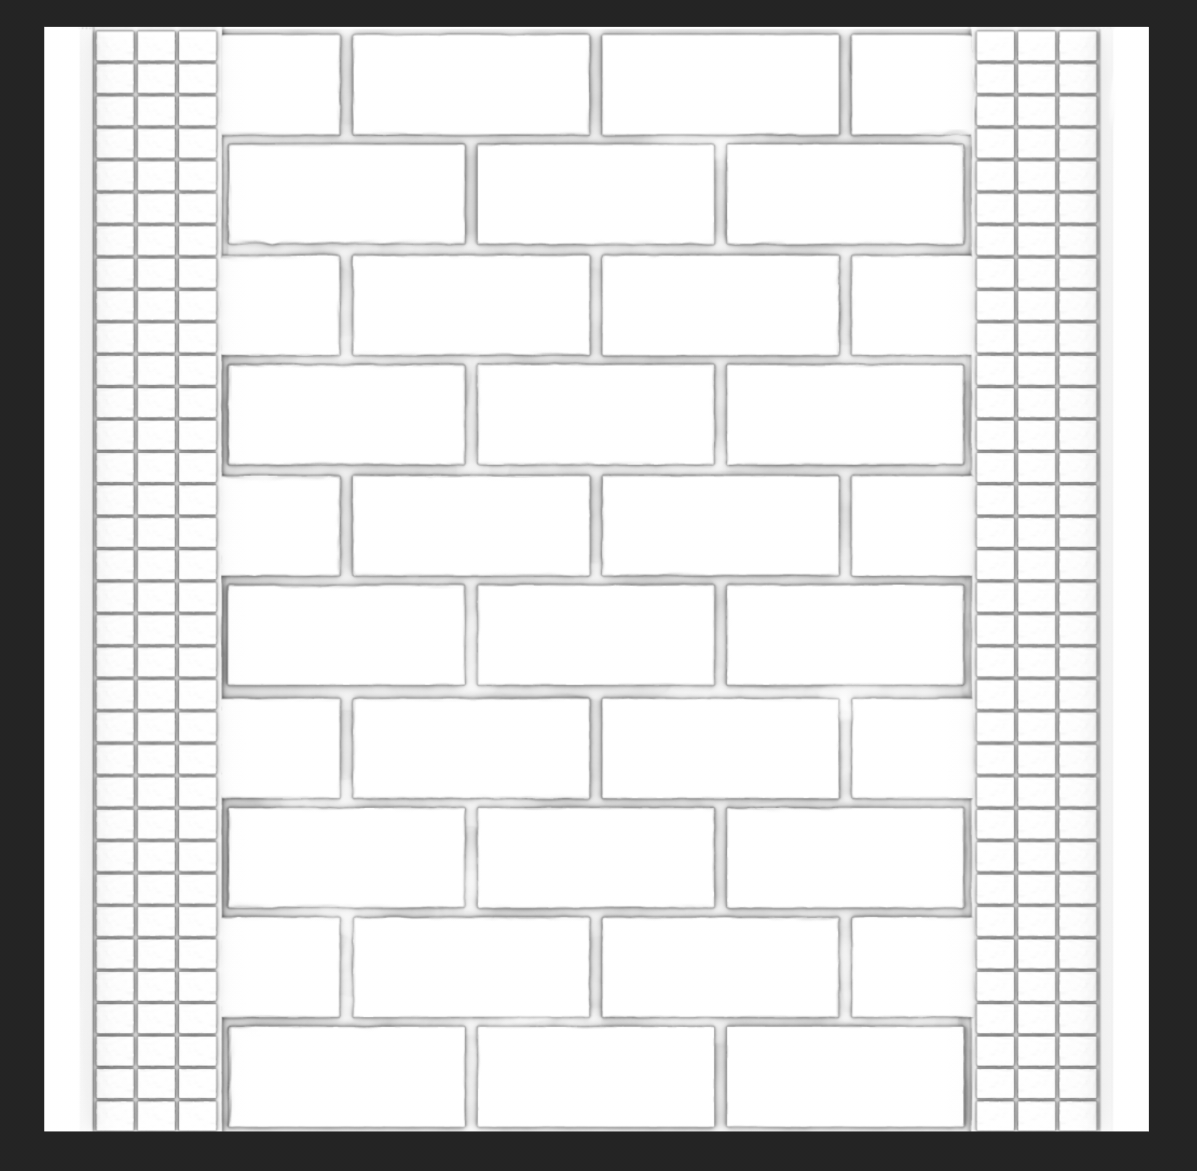
I made a trim sheet with 4 different materials - 3 Different types of Wood and 1 White plaster wall.
Each wood trim was 0.5m tall and 4m wide with the plaster wall being 2.5m tall and 4m wide.
These dimensions created a 4x4m trim sheet and the texture resolution was 4k. This helped me create a consistent look throughout all the pieces and all helped easily map out the UVs.
I created the Trim Sheet using Substance Painter, tweaking the different materials to fit the Kyoto theme. I then carefully UV unwrapped all the models using a UV Checker texture to ensure consistent UV Squares and make sure there wasn't any stretching. After that I mapped the UVs to the Trim Sheet.
I carefully assigned pivot points to each model to be able to snap to each other in the UE Grid perfectly.
Adding onto this, due to the scale of the environment, I wanted to utilize Trim Sheets to reduce the number of draw calls and textures in the scene to improve performance.
I made a trim sheet with 4 different materials - 3 Different types of Wood and 1 White plaster wall.
Each wood trim was 0.5m tall and 4m wide with the plaster wall being 2.5m tall and 4m wide.
These dimensions created a 4x4m trim sheet and the texture resolution was 4k. This helped me create a consistent look throughout all the pieces and all helped easily map out the UVs.
I created the Trim Sheet using Substance Painter, tweaking the different materials to fit the Kyoto theme. I then carefully UV unwrapped all the models using a UV Checker texture to ensure consistent UV Squares and make sure there wasn't any stretching. After that I mapped the UVs to the Trim Sheet.
I carefully assigned pivot points to each model to be able to snap to each other in the UE Grid perfectly.


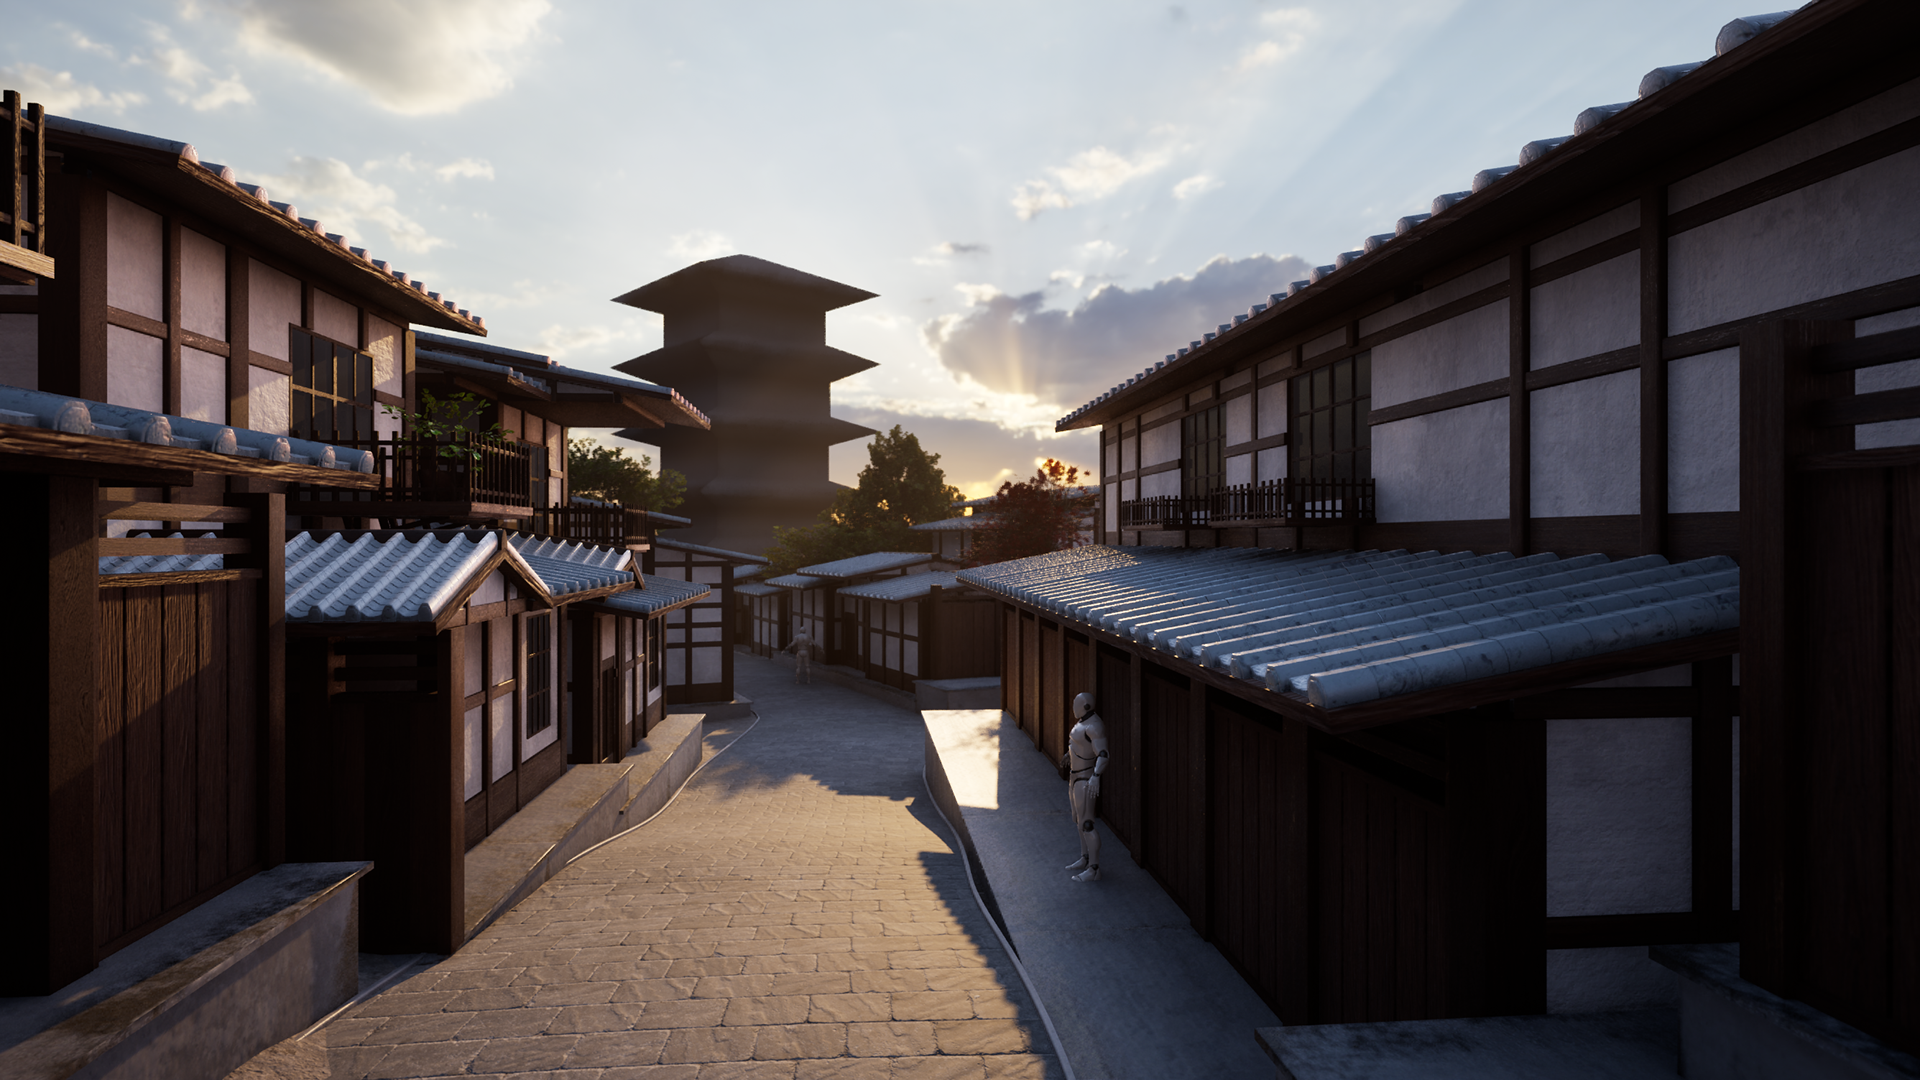
I then created a "playground" level in UE to test out all my pieces and ensure they fit well together. After this I started creating the different buildings using my modular kit and placing them in place of the blockouts.

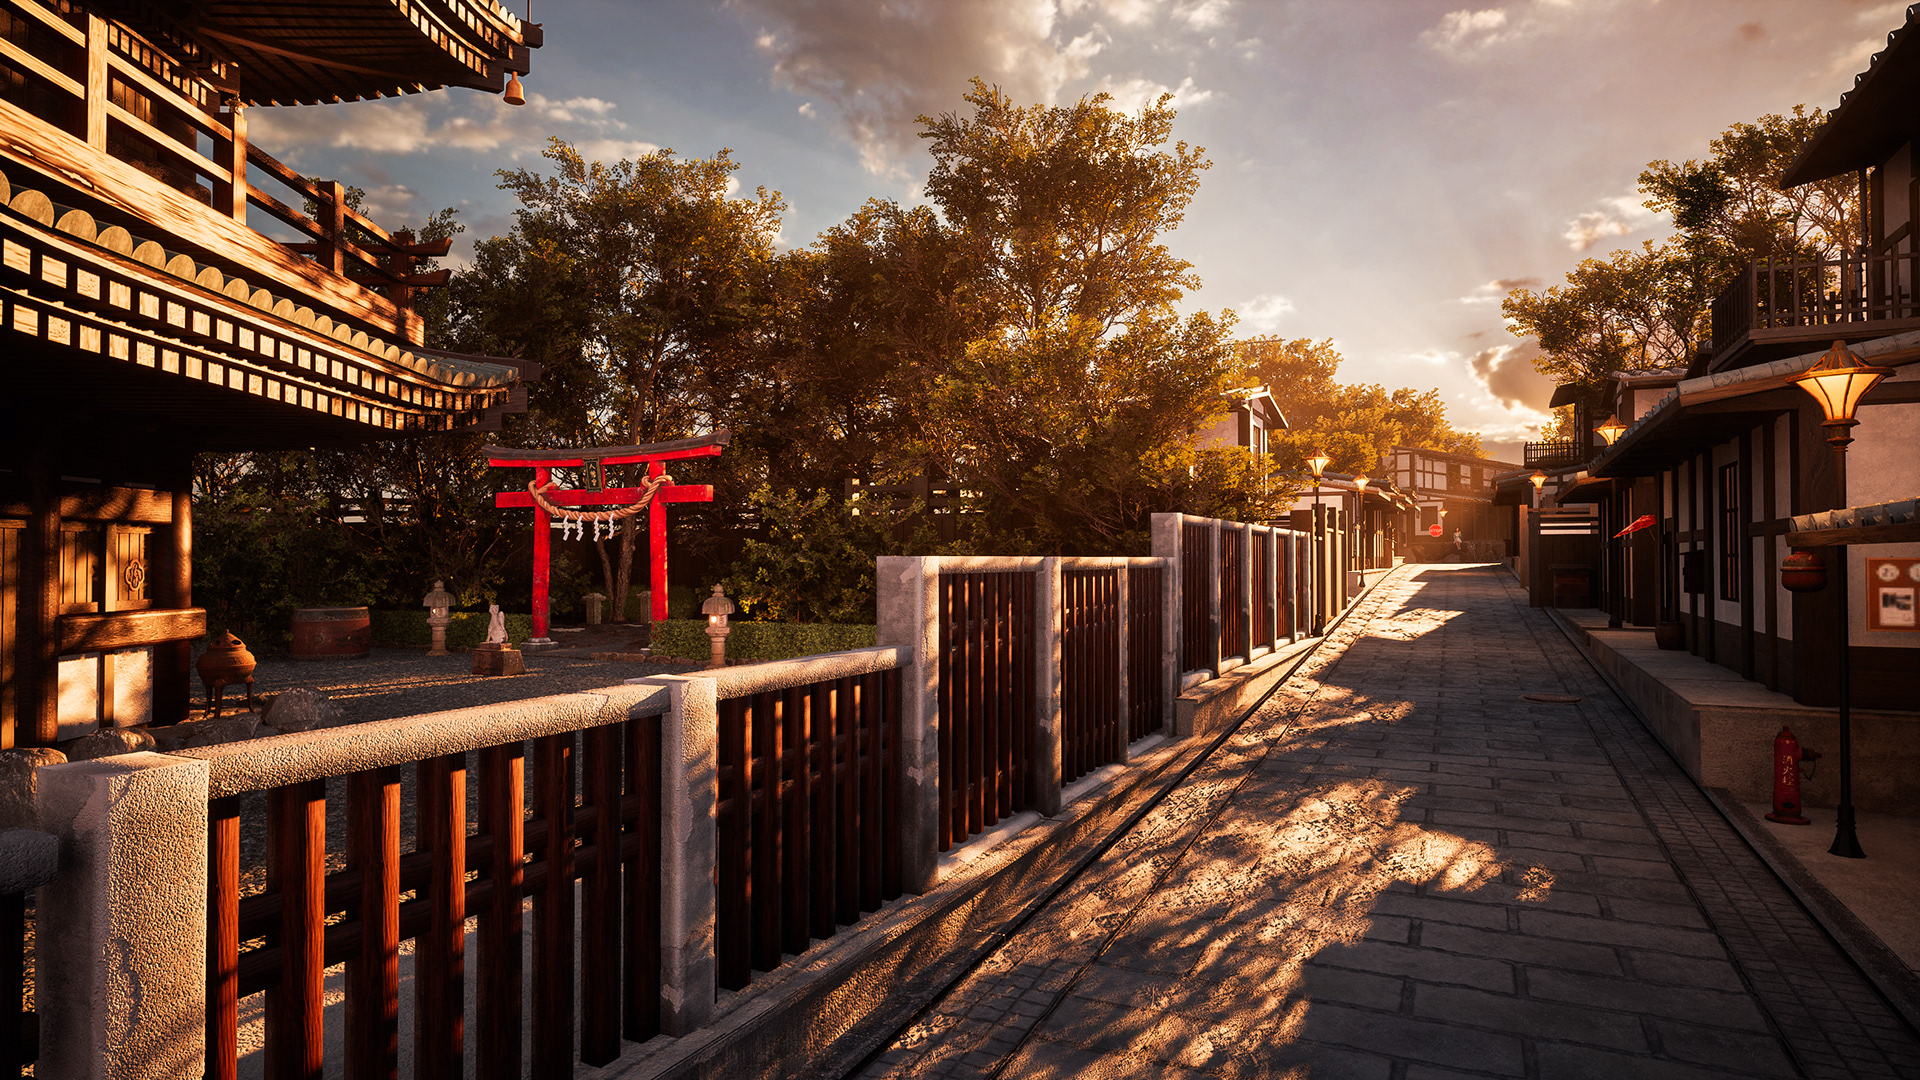
The next step was to create the famous stone path used often in Kyoto. I wanted a good amount of detail and the textures I could find already didn't feel correct to me. So I decided to create my own by first sculpting a High Poly stone road. I used an array modifier to create many square tiles and then hand sculpted every single one to create variations and make it look more organic.
I then took this into Substance Painter and baked it onto my Low Poly mesh.
I then took this into Substance Painter and baked it onto my Low Poly mesh.


I then proceeded to texture the model using several different textures and masks along with the baked AO and Curvature map to add detail and wear and tear. I used a height brush with a darker texture to really add depth to the space between the tiles and create the look of cement between them.
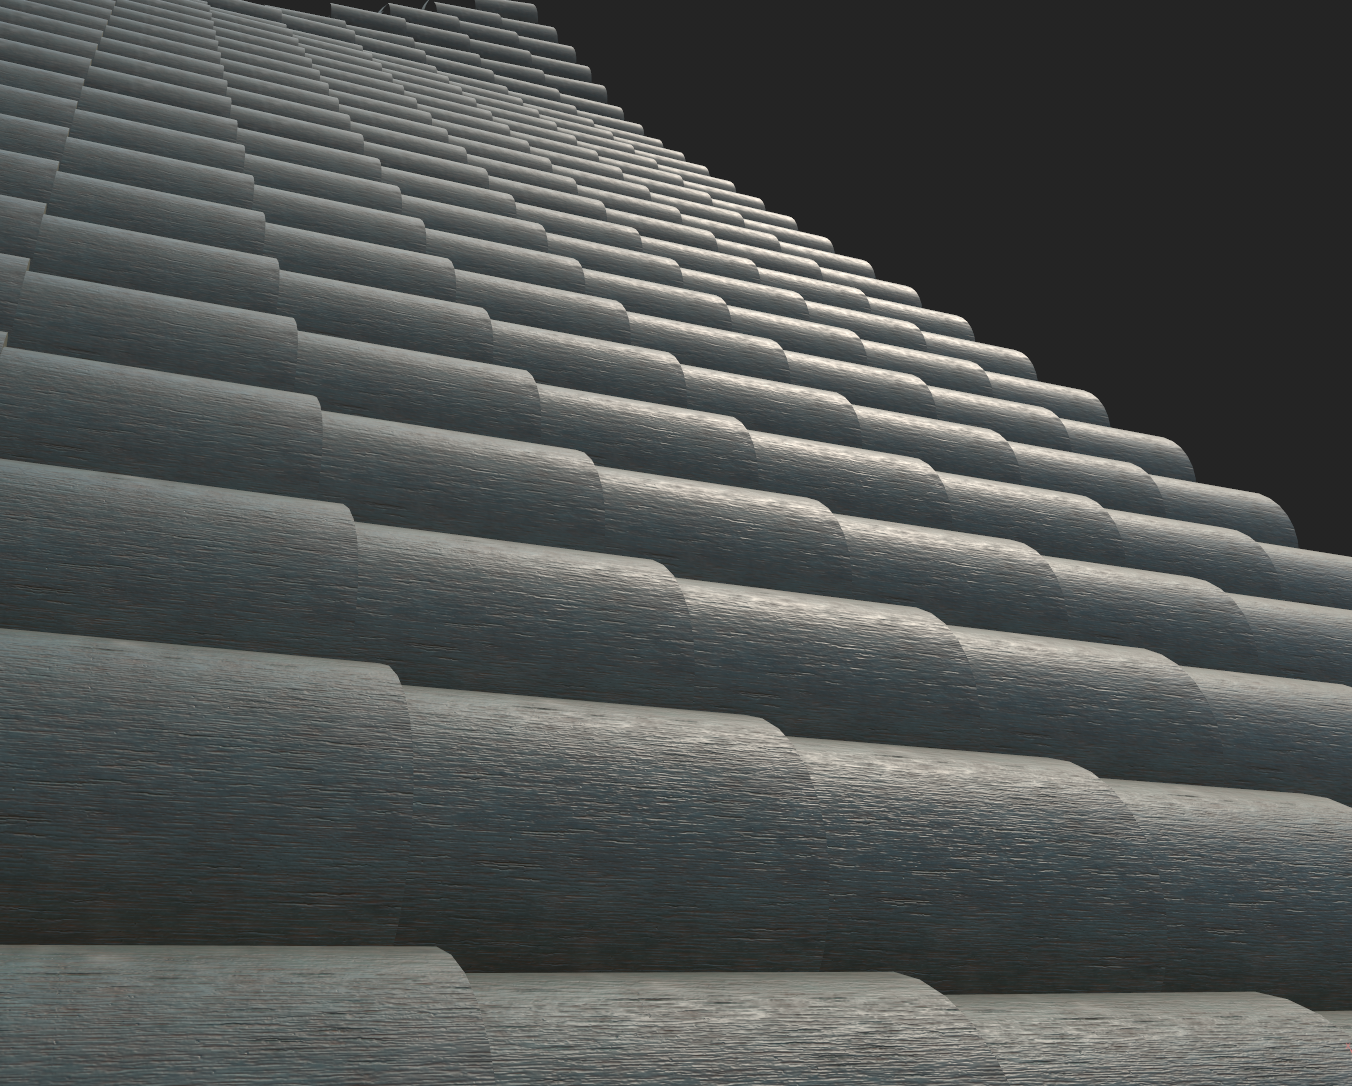
Then to further add detail, I used the height map from substance painter to utilize nanite displacement in UE
This helped accentuate the rough stone surface and make it more realistic.
Then to further add detail, I used the height map from substance painter to utilize nanite displacement in UE
This helped accentuate the rough stone surface and make it more realistic.

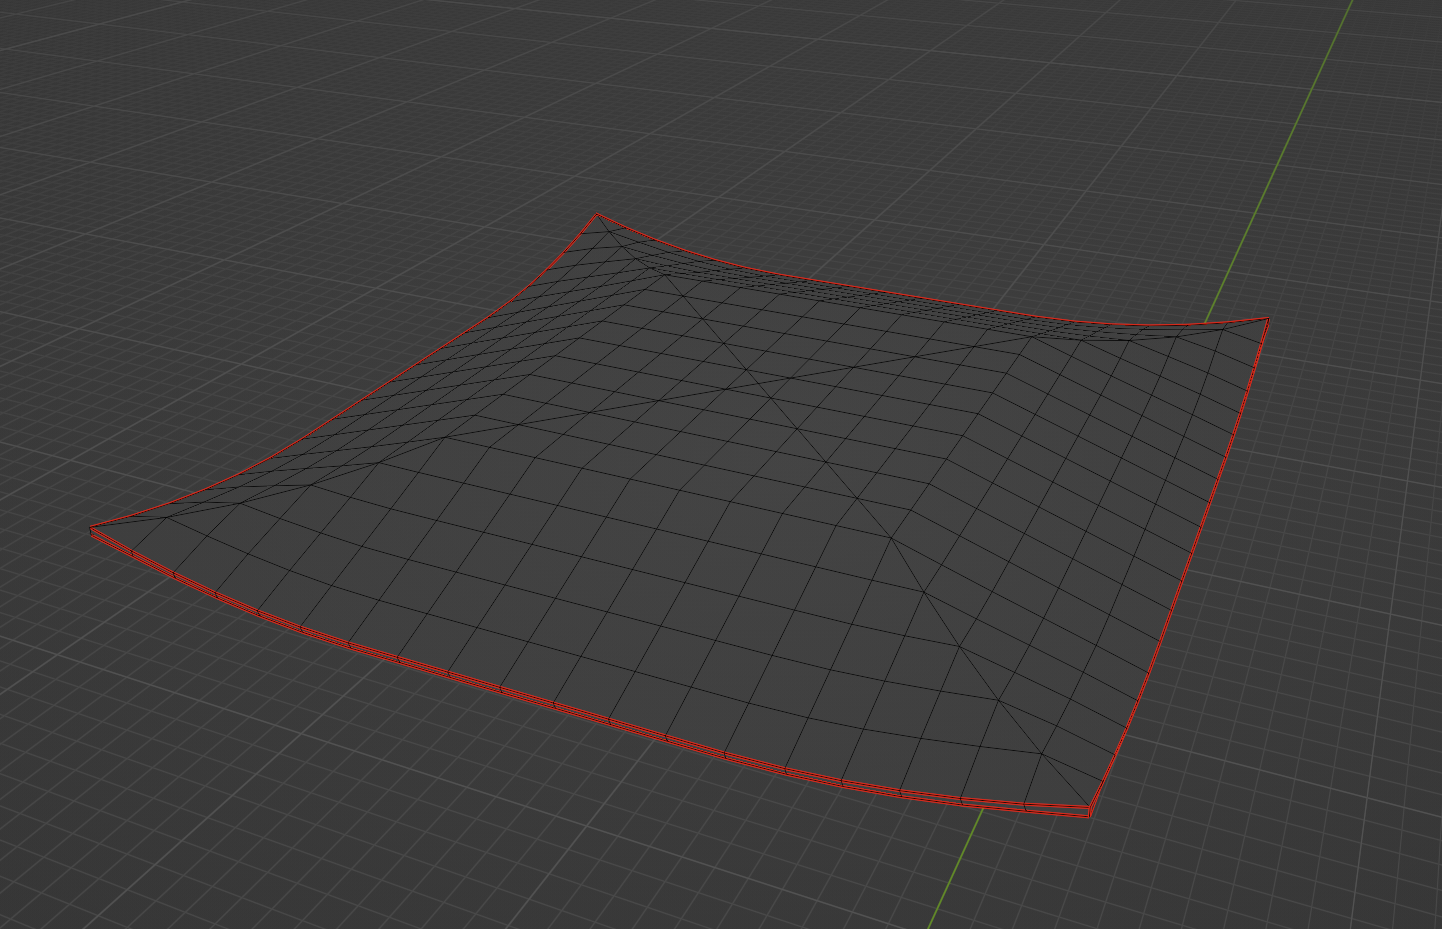
The next step was to create the main piece of the environment which was the Temple itself. I made sure there was good topology throughout the building and utilized the same trim sheet to texture it with some custom textures for the roof made in substance painter. I tried to keep poly count relatively low but the roof pieces had raised the count a lot. However I didn't mind this too much as I wanted real geometry to highlight the kyoto roof style and since I was using Nanite for the mesh and this was an important mesh, I decided it would be okay to have a higher poly count. I then brought it into my UE scene and aligned it to fit the composition.
I also modelled and textured the stone sidewalk platforms. I made it have a concrete finish with lots of scratches, worn patches,dirt and some wet areas. I also utilised nanite displacement to help create the coarse concrete texture. I did the same to create the concrete and wooden walls used near the temple.
I also modelled and textured the stone sidewalk platforms. I made it have a concrete finish with lots of scratches, worn patches,dirt and some wet areas. I also utilised nanite displacement to help create the coarse concrete texture. I did the same to create the concrete and wooden walls used near the temple.
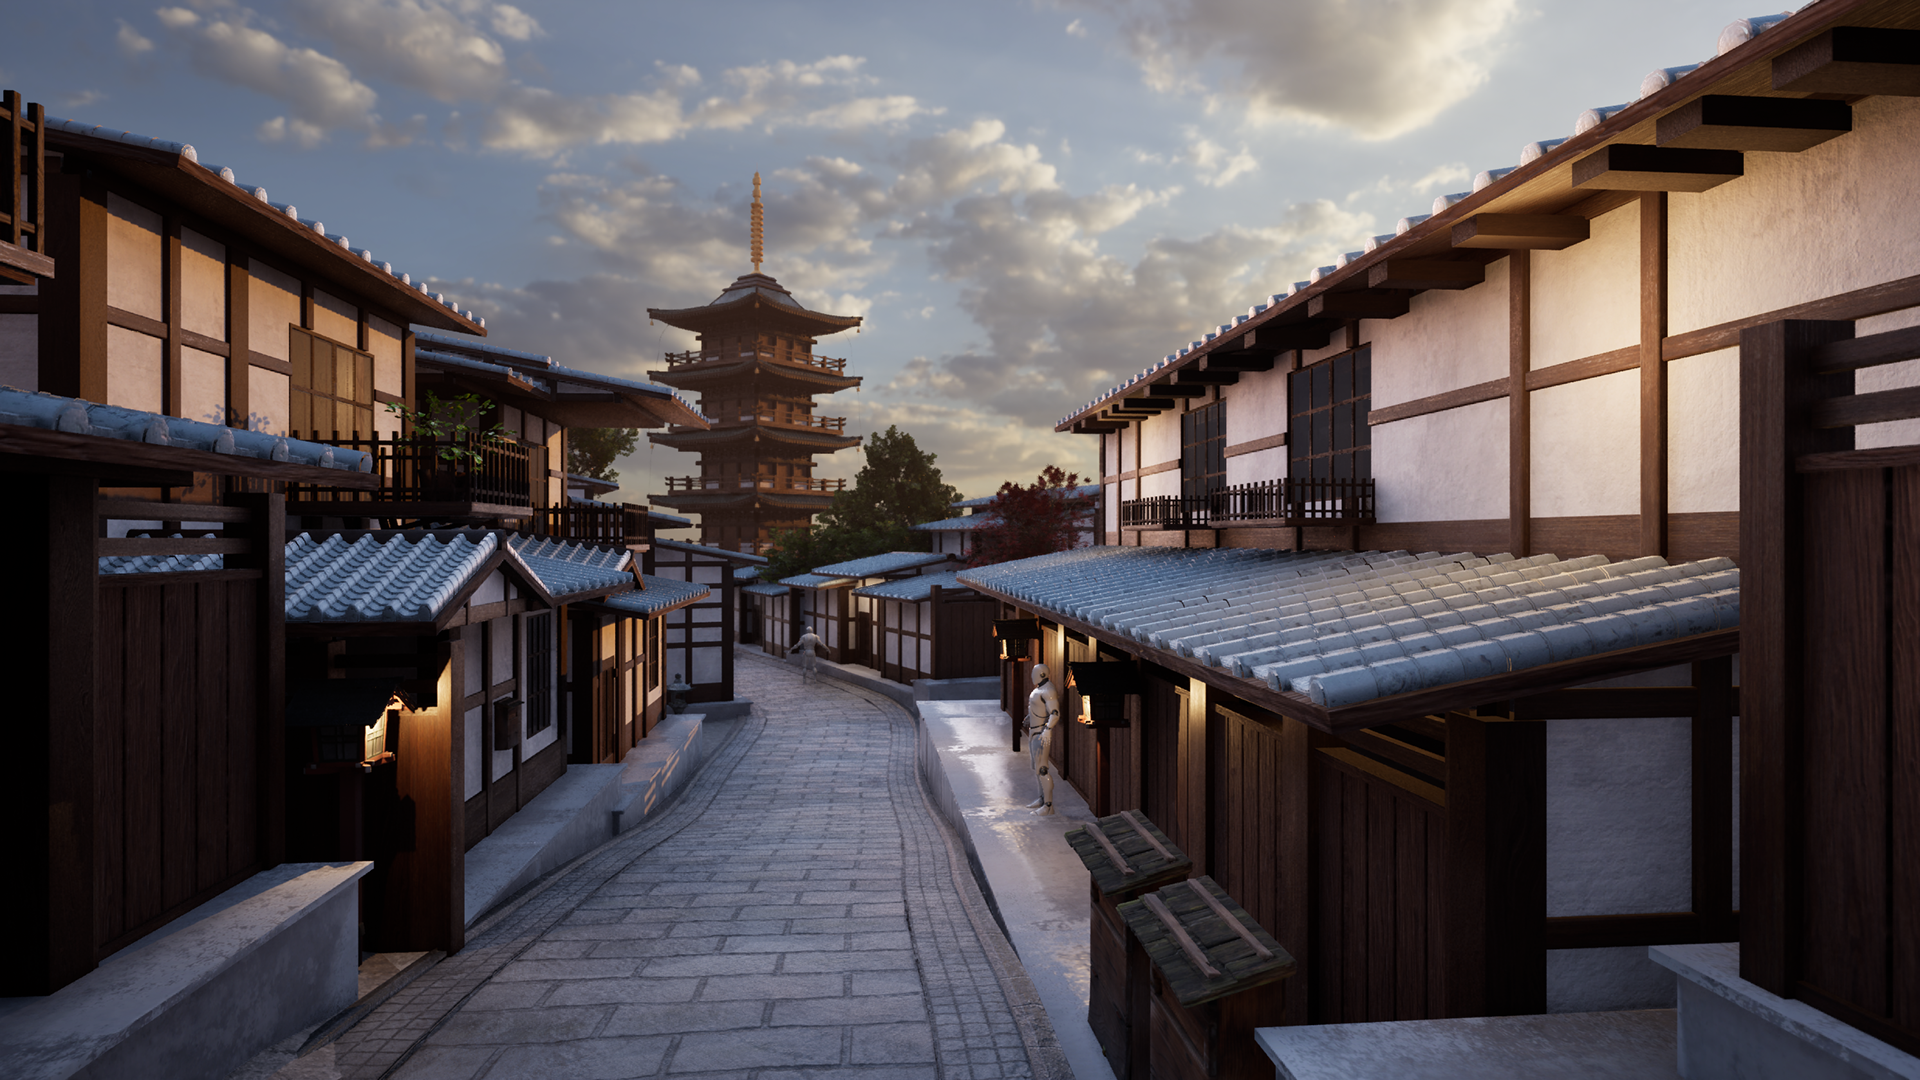


The final hurdle was populating the scene with props and getting the lighting right.
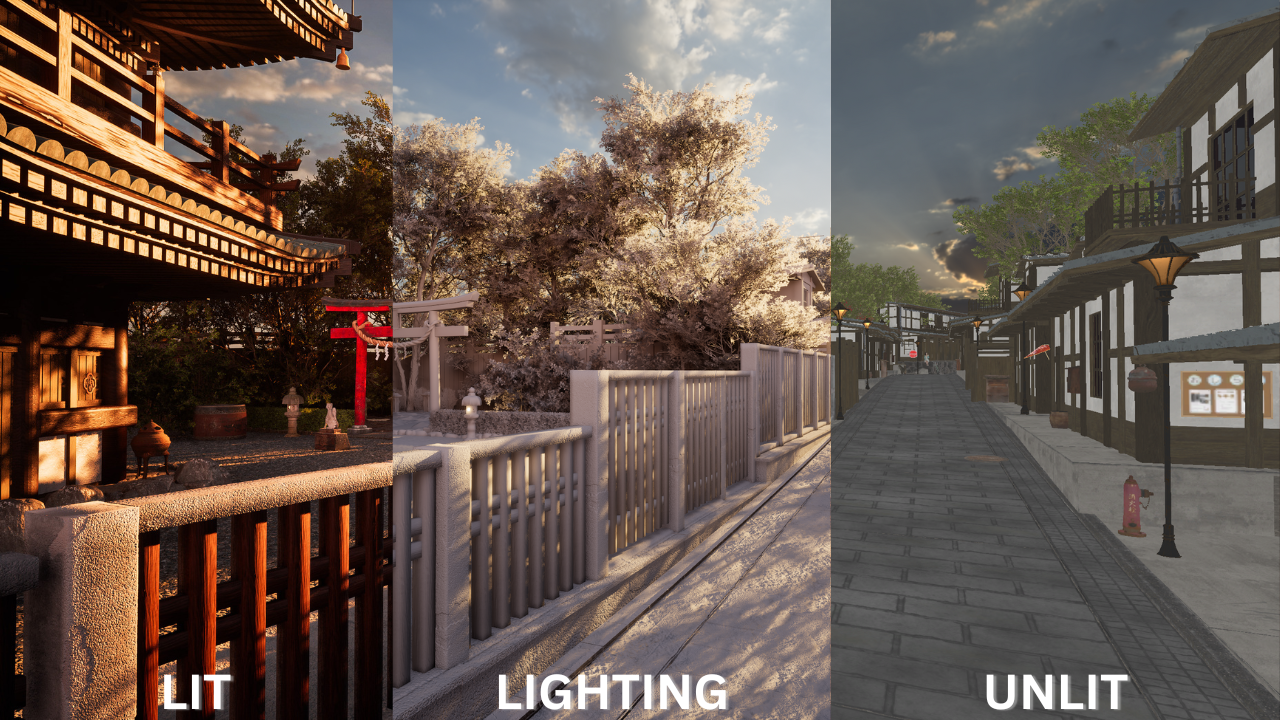
I used a HDRi texture along with a directional light and lights placed through lanterns to illuminate the area. I placed the lanterns in a way where they acted as guide lines along the z axis guiding the viewers eyes to where it matters.
I utilised Quixel megascan assets from Fab to populate my scene and also to add decals to add wear and dirt to several different surfaces.
Using Lumen and exponential height fog helped me create the ambience I was looking for. This involved a long iterative process, constantly changing the location of the sun and playing with different values to create the desired look. I utilised a post process volume to control effects such as bloom, colour grading, etc to better the final look.
After capturing my still, I imported this into Photoshop to add some final colour grading.
After capturing my still, I imported this into Photoshop to add some final colour grading.